 Source: Eating Well
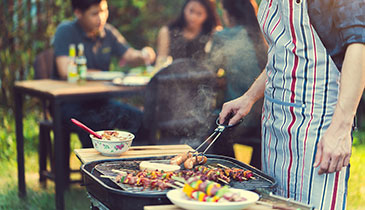
This summer, take cooking outside and start grilling! And we don’t mean only grilling hamburgers and hotdogs – you can grill practically anything on a grill now days. From fish and chicken to vegetables and even fruit! We loved these 13 grilling tips from our friends at Eating Well to help you get prepared for summertime grilling!
1. Gas vs. Charcoal?
The age-old debate over which grilling method is “better” involves multiple variables, from flavor to cost to convenience. While no studies prove that either is healthier, gas does burn cleaner. Charcoal grills emit more carbon monoxide, particulate matter and soot into the atmosphere, contributing to increased pollution and higher concentrations of ground-level ozone. From a taste perspective, on the other hand, many people prefer the smokier, richer taste of food cooked on a charcoal grill.
2. Get It Hot!
Preheat your grill 15 to 25 minutes before you start cooking to make sure it reaches the right temperature (and to kill any bacteria). Your grill should be 400-450°F for high, 350-400°F for medium-high, 300-350°F for medium and 250-300°F for low heat. A properly heated grill sears foods on contact, keeps the insides moist and helps prevent sticking. While searing doesn’t “seal in” the juices (contrary to popular belief ), it does create improved flavors through caramelization.
3. Additive-Free
If you do choose charcoal grilling, we recommend additive-free lump charcoal, which is just charred wood. Conventional briquettes may contain wood scraps and sawdust as well as coal dust, sodium nitrate, borax and additives like paraffin or lighter fluid. As for lighter fluid, we recommend avoiding it altogether. Lighter fluid can release volatile organiccompounds (VOCs) into the air, leave an unpleasant residue on food and pose a serious danger if used improperly.
4. Brush It Off
It’s easier to remove debris when the grill is hot, so after preheating, use a long-handled wire grill brush on your grill rack to clean off charred debris from prior meals. Scrape again immediately after use.
5. Oil It Up
Even on a clean grill, lean foods may stick when placed directly on the rack. Reduce sticking by oiling your hot grill rack with a vegetable oil-soaked paper towel: hold it with tongs and rub it over the rack. (Do not use cooking spray on a hot grill.)
6. Safety First
Food safety is a top priority, so keep these simple rules from the USDA in mind: avoid cross-contamination by using separate cutting boards, utensils and platters for raw and cooked foods; refrigerate foods while marinating; and never baste with the marinating liquid. (Make extra marinade just for basting or boil your marinating liquid first.)
7. Marinate Your Meat
Marinating does more than infuse food with flavor; it also inhibits the formation of potentially carcinogenic HCAs (heterocyclic amines), which form when grilling “muscle meats” like poultry, red meat and fish. According to the American Institute for Cancer Research (AICR), marinating can reduce HCA formation by as much as 92 to 99 percent.
8. A Chimney Starter
A chimney starter (weber.com, $14.99) makes starting a charcoal fire a breeze. Just place crumpled paper in the bottom of the chimney, fill it with charcoal and light the paper. In about 20 minutes the coals will be ready to spread evenly in the bottom of the grill—no kindling, no lighter fluid, no perfect pyramid required.
9. Is It Done?
The best way to know if protein is fully cooked is to check its internal temperature with an instant-read thermometer.
10. Use A Grill Basket
Use a grill basket (bedbathandbeyond.com, $9.99-24.99) for foods that might fall through the grill rack or are too cumbersome to turn over one by one (vegetables, fish, tofu, fruits, etc.).
11. The Hand Test
To gauge the temperature of a grill without a thermometer, place your open palm about 5 inches above the grill rack; the fire is high if you have to move your hand in 2 seconds, medium if you have to move your hand in 5 seconds and low if you have to move your hand in 10 seconds.
12. Tame the Flames
Flare-ups happen when fat drips onto the heat source and catches fire. This causes carcinogenic PAHs (polycyclic aromatic hydrocarbons) to form and accumulate on your food. Meat licked by flames also tastes “off” and flames may char the outside of food before the inside has thoroughly cooked. To reduce flare-ups, select lean cuts of meat, trim excess fat and remove poultry skin. And, keep a squirt bottle of water near the grill to quickly douse any unexpected flare-ups.
13. Give It a Rest
Let finished meats rest on a clean platter, tented with foil, for about 10 minutes before carving so juices can redistribute evenly.